

How to Set Up the Sony A7IV for Quick Hybrid Shooting (Photo & Video)

Table of contents
| 1:10 | First things first! |
| 1:30 | Custom Settings Photo |
| 4:12 | FN Menu Photo |
| 4:31 | Custom Video Settings |
| 8:31 | FN Menu Video |
| 9:54 | Customize FN Menu |
| 10:24 | S&Q |
| 10:39 | Set Up Memory Recall |
| 14:15 | Don't forget to subscribe ;) |
- #commissionearned: Mario So and QualiTube may earn commission at no extra cost to you
Play from here [0:03]
Hello, everyone. I hope you're doing well. Thanks for being here. If you're new here, please consider subscribing. If you're planning to get the Sony A7IV or you already have the Sony A7IV, today's video is going to be how I set up my Sony A7IV for hybrid shooting for photo and video. These are the settings that I like to use on my own camera with my shooting style. Depending on what your shooting style is and what you like to shoot, your settings may change a little or a lot. Maybe you're capturing video footage, but you also need high resolution stills and you need to quickly dial back and forth between photo and video, these are some of the settings that I'll be using on the Sony A7IV that will speed up my shooting between photo and video. That quick dial on the A7IV is going to speed up that process.
First things first!
First things first. There are a few settings that you should be aware of and that you should be setting up before you start shooting with the Sony A7IV. I made a couple of videos about it on what settings to set up. Go check those out, and come back to this video on how I set up my Sony A7IV for hybrid shooting.
Interested?

Alpha 7 IV - Full-frame Mirrorless Interchangeable Lens Camera. Hybrid 33MP up to 10FPS, up to 4K 60p, 7k oversampled for 4K 30p, 5-axis stabilization
Custom Settings Photo
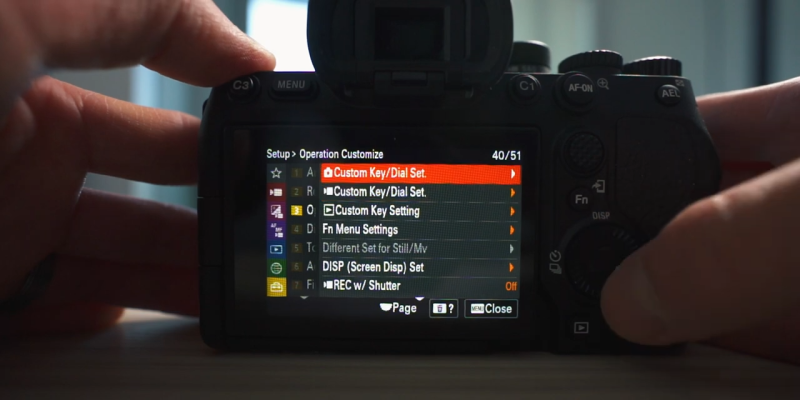
Let me show you what my custom functions are for photo. Honestly, for photography, not much will change since I like to shoot photos always in manual mode, mostly adjusting on the go. If you want to set up any of these custom function buttons, you'll have to go to menu and then go to Custom Key/Dial Set. There are three items there. There's one for photography, one for video, and one for playback. This lets you adjust custom buttons for the Sony A7IV depending on the different mode that you're in. Let's go in to the Custom Key/Dial Settings for photography.

Play from here [2:07]
For number one, I have it set up to auto exposure hold. I have number two AF On, which is useful for back focusing, which I don't really use that much. Number three, which is C1 on the body, is one that I have customized. This I customized to white balance. Number four, which is C3 on the Sony A7IV, is Auto Focus/Manual Focus Selector Toggle. Let's toggle between auto and manual focus right away. Number five, I will leave as a default. Sometimes, I like to turn this off if I'm touching the screen a lot, and it's thinking that I want to focus on that part of the screen, so I like to turn that off whenever that's happening.

Play from here [2:50]
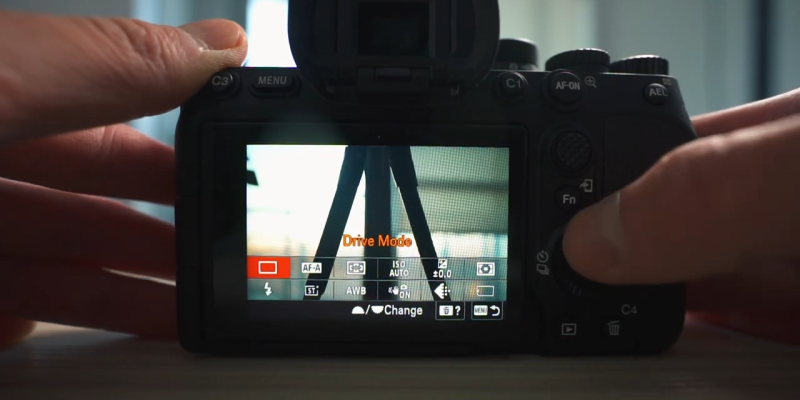
For the dial, Focus Standard, I have this set to default. I don't have anything set to number two, which is the middle button on the Sony A7IV. For Drive Mode, it's the same, default. For ISO, it's still default, and nothing set on number five. Movie Shooting doesn't change as well on the recording button on top, nothing changes. The Focus Area, C2 as well is set to default. Focus Hold, I rarely use that, so I don't have that set up. Number three, one of the dials on top, which used to be the exposure compensation dial in photo mode, it'll stay the exposure compensation dial for me, but it changes for video and I'll be showing that to you.
Play from here [3:38]
So that's it. It's pretty much it for photography. I don't change much, so my auto focus/manual focus toggle switch, C2, which is my focus area, and then I have white balance. The right button on the Sony A7IV is really good for me. What if I want to do high speed burst shooting? I have bunnies, and they have their own Instagram account. Sometimes, it's very difficult to catch them in the right moment, so I shoot in high speed burst. Me or my wife, depending who's shooting them, mostly my wife, she always shoots in high speed burst mode, which is the high plus.

Interested?
Alpha 7 IV - Full-frame Mirrorless Interchangeable Lens Camera. Hybrid 33MP up to 10FPS, up to 4K 60p, 7k oversampled for 4K 30p, 5-axis stabilization
FN Menu Photo
What I have here as well for photography is when I go to the function menu, these are the things that I have set up in here. These are actually factory defaults. I didn't find a need to further adjust these settings on the Sony A7IV, so I left them as is. That's it for photography. Let's now move on to the video side of things.
Custom Video Settings
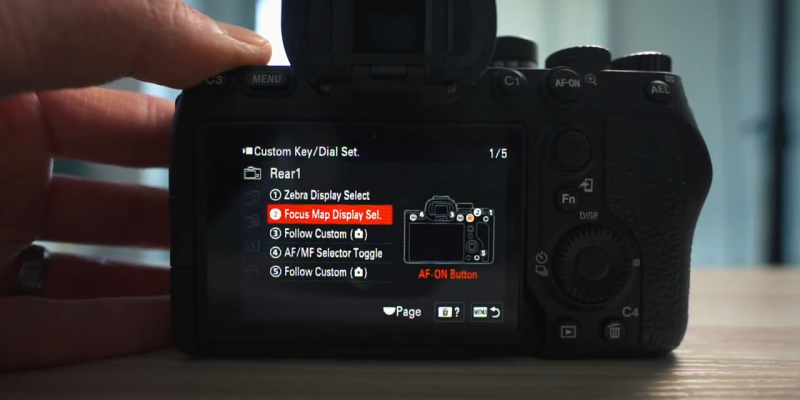
One thing you need to realize is that there is a knob that lets you adjust between the different modes, so you get photo mode, movie mode, and SNQ mode. If you have no idea what SNQ means, there is a video that I made a while ago about SNQ and how it works and everything. That was based on the Sony A7III. The concepts are the same, but some of the file formats may be different. You can check that out. Let's jump on to movie mode. Again, go to menu, and this time, we'll customize the keys for movie. For number one, I have set the button to Zebra Display Select. I'm going to talk over all the things that I have set up first, and then I'll show you what they do in the camera. Number two is Focus Map Display. This is a new feature on the Sony A7IV.
Play from here [5:23]
I have it there to quickly toggle to that focus map if I'm unsure about my focusing. Number three, this just tells the Sony A7IV to follow whatever custom setting I had for photo, which was white balance. Again, this is the same Auto Focus/Manual Focus Selector. This one is just to follow the button that I set up for photography. Let's go to Rear2. Number one, I have it to follow photography settings. Number two, I have it to punch in to APS-C Super 35 mode, and that gives me that extra reach. Follow photography on number three and four. Number five is Clear Image Zoom. I have it set to the down button. To make sure you're actually enabling Clear Image Zoom, let's head back first, go to menu, and let's go all the way to Shooting, then Zoom.
Play from here [6:16]
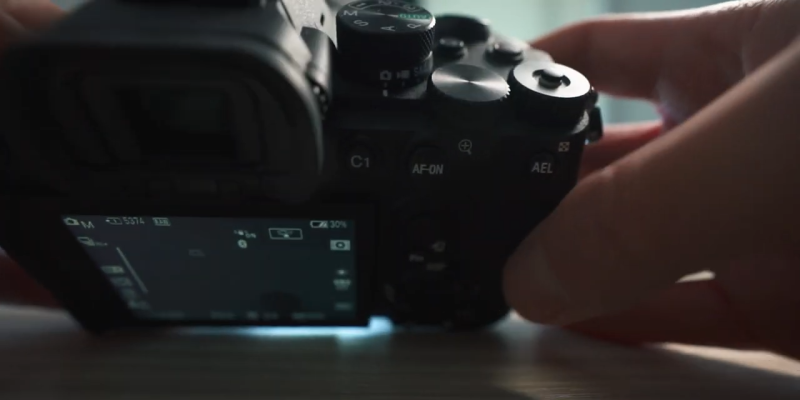
In the Zoom range, make sure that you have Clear Image Zoom selected. This is going to let you zoom into your Sony A7IV without losing quality. Let's move on to the Top, then Movie Shooting, and to C2, I actually have that mapped to Audio Recording Levels. It's a really quick and easy way for me to just toggle recording levels. To the back on the number three, on the exposure compensation dial that we used to have on previous cameras like the Sony A7III, now we're able to fully customize this dial, and I have it customized to ISO. That way, I have three dials that adjust exposure for me. I have shutter speed, aperture, and ISO. All three will be dials, and I really like that. Now, let's discuss what all of these buttons do right here in camera.

Interested?
Alpha 7 IV - Full-frame Mirrorless Interchangeable Lens Camera. Hybrid 33MP up to 10FPS, up to 4K 60p, 7k oversampled for 4K 30p, 5-axis stabilization
Play from here [7:07]
C2 will access the Audio Recording Level, so I can quickly adjust the levels of my audio recording. I can toggle it to turn it off if I'm done. The AEL button is now my Zebra Display. It turns it on and off. The AF-ON, that's the Focus Map. C1, there's my White Balance. It's set to auto for now. C3, is my Auto Focus and Manual Focus toggle. Going back, we have my ISO on the right. The DISP, that doesn't change. To the left, I don't have anything set up for video. Let me know how you have your Sony A7IV set up. Below is Clear Image Zoom, so as soon as I'm here I can access it right away and zoom in however little or however much I want. That combined with the center button, which is the crop mode, pretty handy. For the Exposure Compensation Dial, I have this set up to my ISO. I have these three that will help control the exposure. Aperture at the front, shutter speed, and ISO.

FN Menu Video
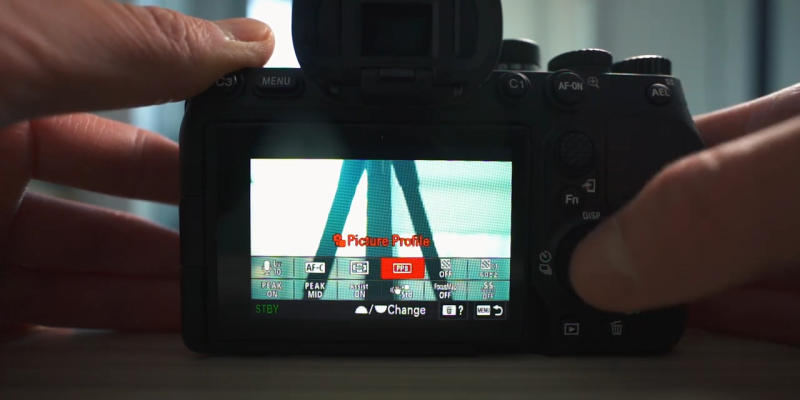
Let's go over the Sony A7IV function menu in video mode. I have Audio Rec Level. I have Focus Mode, and Focus Area. Picture Profiles are over here, so I can quickly toggle to come into the function menu and change picture profile, but most of the time it stays there in SLOG 3, so I don't really change it. Next is Zebra Display on or off and Zebra Display Level. This I would change depending on how I'm exposing or where I'm at. The Zebra may go between 50 to 70 depending if I'm trying to expose more skin tones and all of that kind of stuff. Next is Peaking on or off.
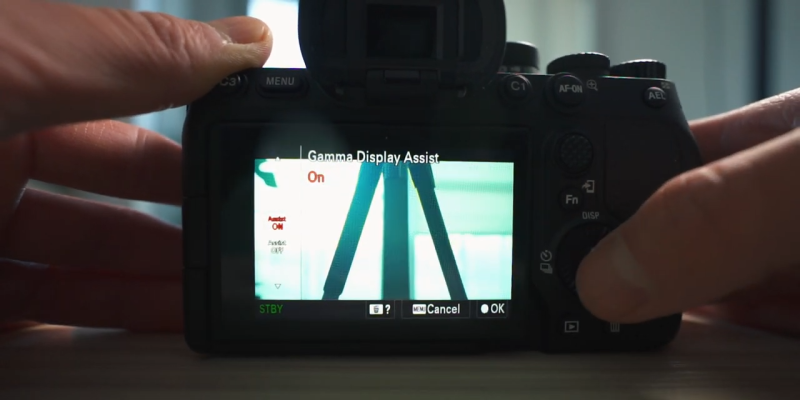
Play from here [9:10]
If this is Peaking Level, I have the Gamma Display Assist, which I'll toggle between on and off. If I'm shooting an SLOG 3, which is right now, if I have it off, it looks all gray. I like to have it on, so at least it gives me a better shooting experience. Next is Steady Shot, Focus Map, and this is a very good one to have Variable Shutter. This is new on the Sony A7IV. If you have it set to on, it lets you fine tune your shutter speed. This is useful when you're in a location that has lighting in the weird frequency that is giving you a lot of flickering in your image or bending and all that kind of stuff. You can fine tune your shutter speed so that you can get rid of that stuff.
Customize FN Menu
To customize your function menu, you need to go to menu again, then to FN Menu Settings. Here is where you will customize everything in the function menu. These are the settings that I have set up for photography and for video. This is how I like to set up my stuff. As of today, some of these things may change as I start shooting more with the A7IV and as the year progresses, so I can update you later on in the year to see what my new settings are, but these are the ones that I'm setting for now.

S&Q
For S&Q mode, there isn't a way to set up settings for that, so once you're in S&Q mode, I think the Sony A7IV just follows the settings that you have set up for video for the custom buttons.
Interested?
Alpha 7 IV - Full-frame Mirrorless Interchangeable Lens Camera. Hybrid 33MP up to 10FPS, up to 4K 60p, 7k oversampled for 4K 30p, 5-axis stabilization
Set Up Memory Recall
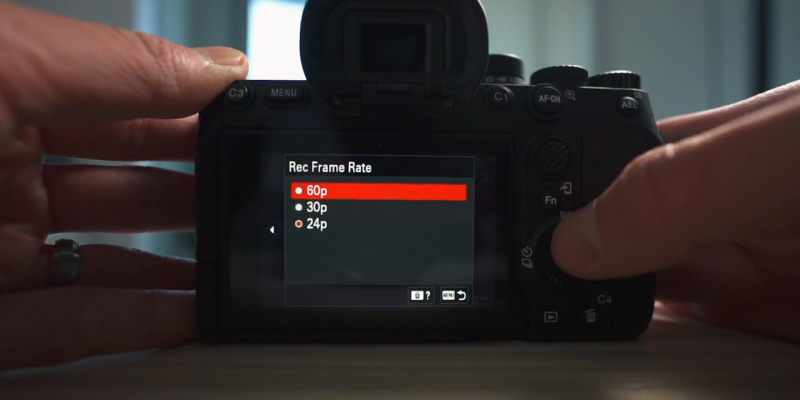
The last thing that I want to share with you is how to quickly set up your top buttons. On this A7IV, there are three numbers. There is a one, a two, and a three. You can set up three memory recall functions, and this is very useful for me, particularly when I shoot video. What I have done is I set up each of those modes to different frame rates, so I can quickly go from shooting 24p, and if I want to grab a slow motion clip, I just switch it to number two. If I wanted super slow motion at 120 frames per second, I switch it to number three. Let's discuss how I set that up. Let's start with the dial in manual mode and in movie mode. I'll set it for shooting in 24p.
Play from here [11:27]
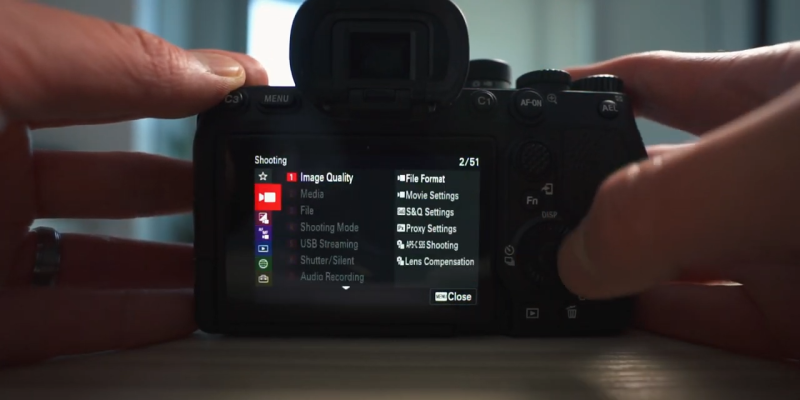
Go to Menu, go all the way to Image Quality, then File Format, and 4k. Movie Settings will be 24p and 4:2:2 10bit. It's going to give me more colors to work with later in post for color grading. Since I'm shooting at 24 frames per second, I want to double my shutter speed, so I'll adjust the shutter speed to 1/50, which is the closest. ISO would be at base ISO for SLOG 3, which is 800 and aperture, I'll leave it at F2.8. This is what I want my number one Custom Recall Setting to be. To save, go to Menu. In Shooting, go all the way to Shooting Mode and then Camera Set Memory, and then we'll set this to number one. It's registered on the Sony A7IV and ready to go.
Play from here [12:17]
Now, let's go back and let's change this setting for 60 frames per second for Slow Motion. First, Image Quality, then File Format, which we'll leave at 4K. Movie Settings, we'll go to 60 frames per second. Record Setting, we'll leave at 4:2:2 10bit. Let's go back. Shutter Speed again, double that or your frame rate, so it will be 1/120. The closest is 125, so it's 1/125. ISO, leave it at 800. Aperture at F2.8. Let's go back to Menu now and go to Shooting Mode, Camera Set Memory, save it to number two, registered. The last one will be 120 FPS when I want super slow motion. Let's go back to Menu, then Image Quality. The Sony A7IV cannot shoot 120 frames per second in 4K, so I'll go to XAVC S HD. Movie Settings, 120.
Play from here [13:14]
Record Setting will be 4:2:0 8bit. I'm not able to shoot 10bit in HD with my current memory card. Then, let's just go back, and Shutter Speed will be 1/50. That's the closest. I'll leave it at F2.8 and at ISO 800. Go back to Menu, go to Shooting Mode, set the memory, and register it to number three. I'll toggle it to number one, and it changed it to 4K, 24p. Shutter Speed changes as well. Number two changes to 4K, 60. The Shutter Speed changes as well. Number three HD, 120p. Shutter Speed changes as well. It's a very quick way to toggle between your different shooting scenarios. I shoot pretty much all of my stuff here on this A7IV with SLOG 3, so I leave that as is for all the settings. If you wanted to have individual picture profiles associated to one of these quick memory settings, then you can do that as well.

Don't forget to subscribe ;)
That's it for today's video. I hope that you enjoyed it if you learned something new. Let me know in the comments here what function or setting you will use in that left button. I don't have anything reserved for that right now, so let me know what you would do there, and I might put that there as well. That's it for today's video. I hope you stay well, you stay safe, and until next time.
Interested?
Alpha 7 IV - Full-frame Mirrorless Interchangeable Lens Camera. Hybrid 33MP up to 10FPS, up to 4K 60p, 7k oversampled for 4K 30p, 5-axis stabilization

About Mario So
I am a filmmaker and photographer passionate about visual story telling. I create content on how to make videos, camera gear review and how to videos to help you take your video content to the next level!